
How to Make a DIY Bow Tie
Bow ties can be formal or stylish, fancy or fun. They can be a clever way to dress up or make a great statement piece. Buying a new bow tie is great, but as always, it’s always better to make one yourself!
Check out this easy guide to making a simple new bow tie.
step 1:
Choose your fabric. Do you want your bow tie to show off your subtle glamour, or to stand out in a bright patterned way?
View in gallery
(Source: Kitworks)
Step 2:
Gather your materials. you need to:
- your sewing machine
- ironing board
- your iron
- 1/4 yard ironing interface
- Bow Tie Pattern (you can download it here)
- 1/4 of the fabric of your choice
- good cloth scissors
- Thread that matches your fabric
- pin
View in gallery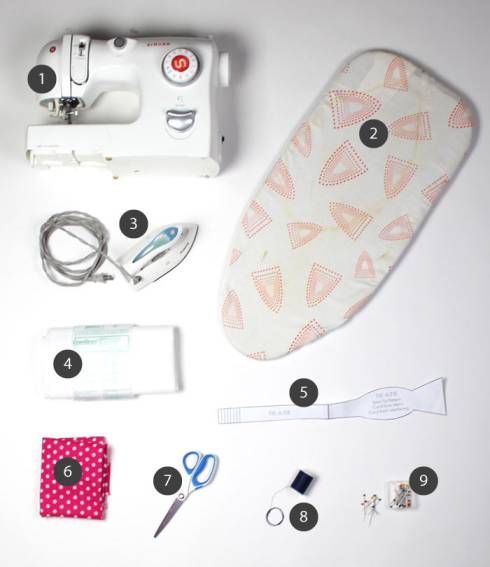
(Source: Tie)
Step 3:
Print your bow tie pattern. Printing it on thicker paper, such as card stock, works well because it retains its structure well as you work.
View in gallery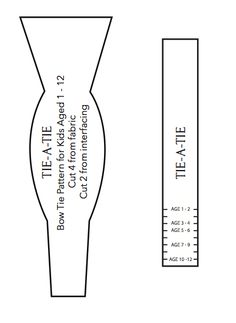
(Source: Doctstoc)
Step 4:
Cut the pattern along the black line and stick the two pieces of tape together so you have a pattern to work with.
View in gallery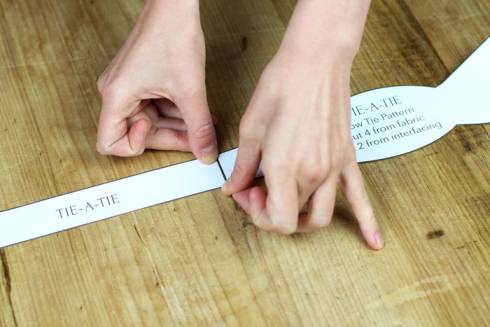
(Source: Tie)
Step 5:
Pin the pattern to your fabric and cut out the shape. Repeat the process three times with the fabric. Next, fasten the pattern to the interface and cut out a piece. Repeat the process again. In the end, you should have four fabric pieces and two interface pieces.
View in gallery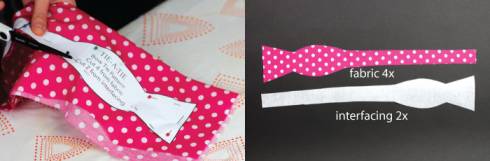
(Source: Tie)
Step 6:
Fasten the two seam pieces to the back of the two fabric pieces, making sure the patterned side of the fabric is away from the seam. Iron the pieces together.
View in gallery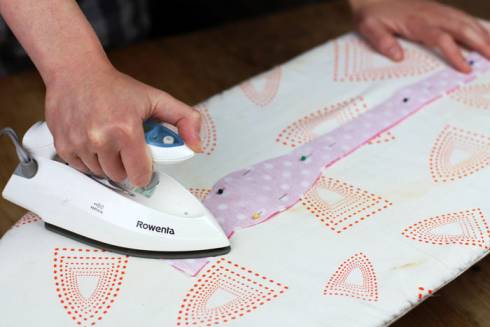
(Source: Tie)
Step 7:
Now you have two pieces of fabric with joints and two pieces of fabric without joints. Next, take two matching pieces and line them so that the patterned sides (or right sides) are against each other. Sew the pieces together along the bottom edge of the thin end. Make sure to leave a 1/4″ seam allowance. Repeat the process with the other two matching parts.
View in gallery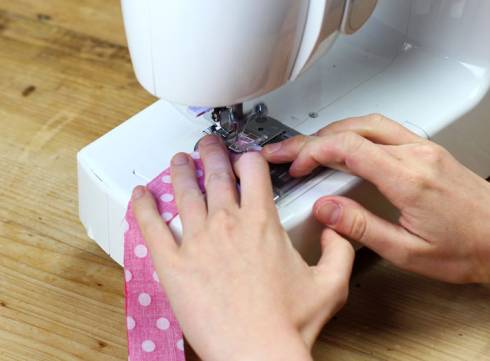
(Source: Tie)
Step 8:
At this point, you have two longer sections. Bring them against each other so that the edges line up and the sides of the pattern (or the right side) are against each other again.
View in gallery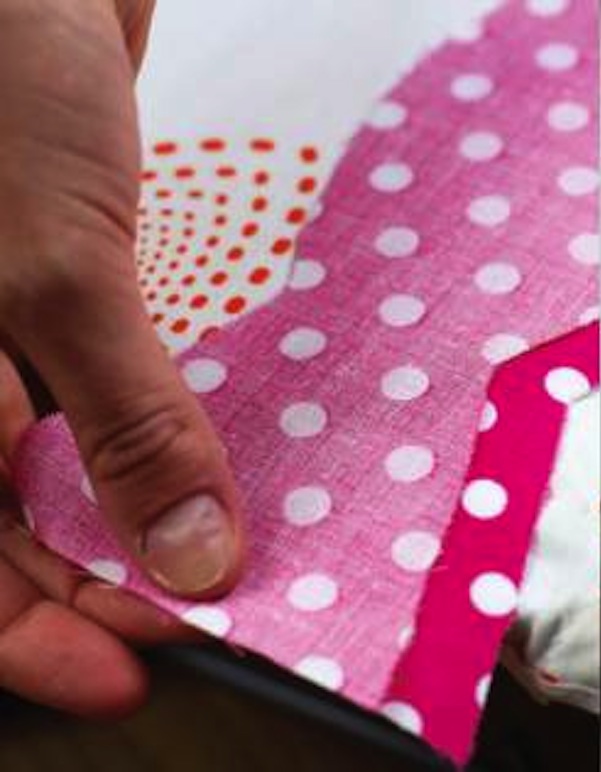
(Source: Tie)
Step 9:
Nail along the edge, leaving about 1/4 inch of space along the edge for the seam to form as you sew.
View in gallery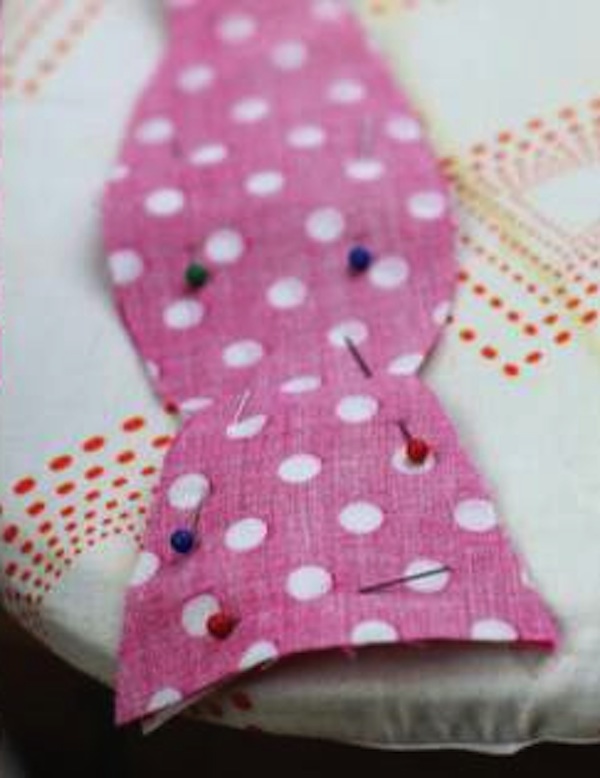
(Source: Tie)
Step 10:
Use a sewing machine to sew along the edge of the fabric, leaving room for the seam. In the middle where the straps get thinner, make sure to leave about 3-4 inches of gap, no stitches. This hole is how you turn the bow right out.
View in gallery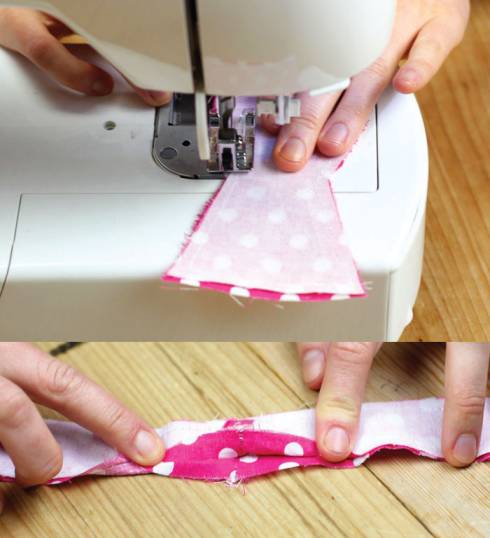
(Source: Tie)
Step 11:
While your tie is still inside, use your scissors to cut off the tip of each corner. This will ensure your bow tie has nice sharp corners as you turn right out.
View in gallery
(Source: Tie)
Step 12:
Turn the right side of the bow tie out through the gap you left when you sewed the edge.
View in gallery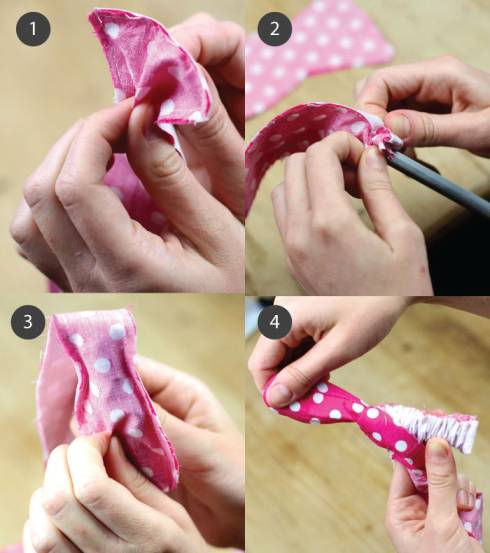
(Source: Tie)
Step Thirteen:
Use tweezers to pull out any indents on the corners and edges of the tie ends, then set it aside and iron the entire strip flat.
View in gallery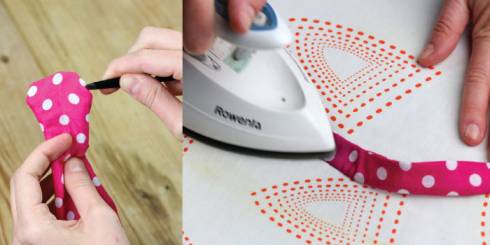
(Source: Tie)
Step 14:
Seal the gap you opened earlier. Fold the edge of the gap on each side and iron it in place to help it hold. Next, sew along the new edge where the folded ironed edges meet.
View in gallery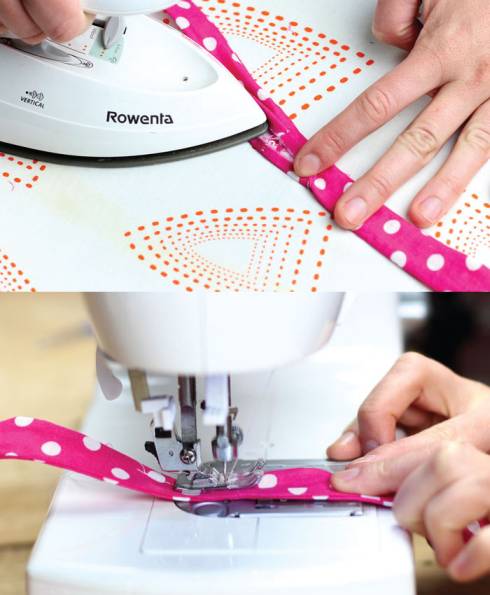
(Source: Tie)
Step 15:
Put on your tie and rock out!
View in gallery
(Source: Tie)
Once you’ve made your own bow tie, please link us to a picture of your work in the comments section!
Check more articles in our categories DIY Home & DIY Projects et encore Tips & Crafts .
Thanks for visiting we hope our article How to Make a DIY Bow Tie
, we invite you to share the article on Facebook, instagram and e-mail with the hashtags ☑️ #DIY #Bow #Tie ☑️!