How to make a clock out of wrapping paper
Have you been thinking about updating or making a new clock for your home but don’t know what materials to use or what style to try? Clocks are often expensive purchases, but not always. To get a clock that perfectly suits your decorating needs, it’s best to make one yourself!We found a lovely and delightful DIY Wrapping Paper Clock Project It will be perfect for the modern interior of your home. Add color and pattern instantly and it makes a great gift too.
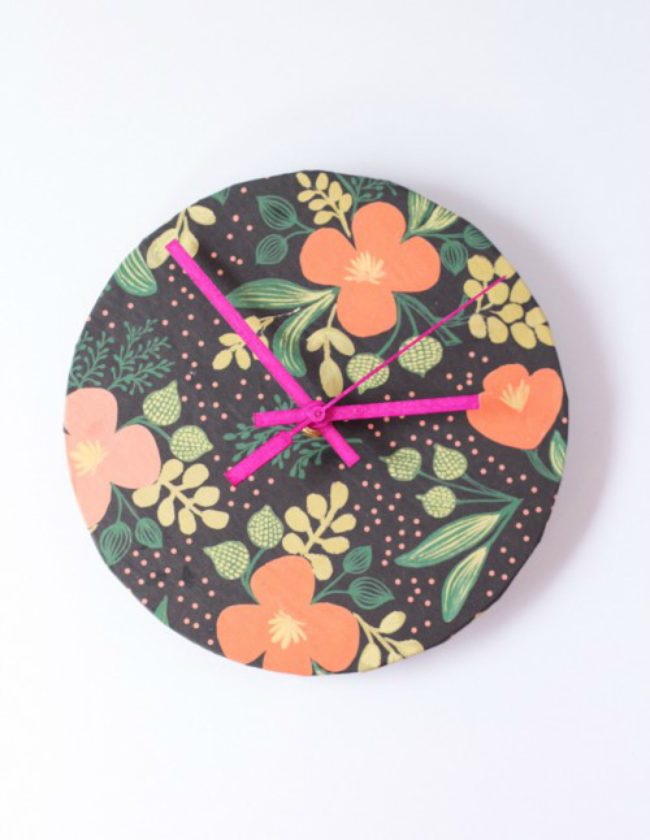
wrapping paper clock
View in gallery
Materials you need:
- clock base
- clock kit
- wrapping paper
- Modified cabin
- sponge brush
- spray paint (optional)
View in gallery
step 1:
If you use dark wrapping paper, consider using bright colors for the clock hands. This way, you’ll see the clock hands stand out from the wrapping paper clock face and give your finished clock a lovely, contrasting look.
Step 2:
View in gallery
To make your clock base, simply draw a circle around the clock base and you will use the wrapping paper of your choice. Then cut around the circle, leaving an inch margin, all the way around. This doesn’t need to be too neat, as you’ll be tucking this one-inch edge behind the clock face, so it won’t really be visible.
Step 3:
View in gallery
Next apply a ton of mod podge to your clock base and make sure you’ve got everything covered. Cover the base with the cut wrapping paper and use your fingers to smooth out any bumps and bumps. Now wrap the one-inch edge of the wrapper around the back of the clock base and let it dry completely.
Step 4:
View in gallery
When the glue is completely dry, use an X-Acto knife to cut a hole in the back of the clock face. Here you will fix the clock hands for the finished hand wrapping paper clock. It’s important to note that this needs to be done really carefully so as not to tear the existing wrapper or create awkward cuts in the design.
Step 5:
View in gallery
Now is the time to use the clock kit, all you need to do is install it following the instructions provided. Once done, your DIY wrapping paper clock is ready! It only takes up to an hour of work, and even your kids can get involved in this fun project.
Now all you have to do is decide where you want to put your newest and coolest homemade clock!
Discover more articles in our categories DIY Home & DIY Projects et encore Tips & Crafts .
Thanks for visiting we hope our article How to make a clock out of wrapping paper
, help us and share the article on Facebook, pinterest and e-mail with the hashtags ☑️ #clock #wrapping #paper ☑️!